Easy Drawings Tumblr Pineapple Easy Drawings Tumblr
This tutorial explains how to draw and shade a realistic looking pineapple with step by step pencil drawing examples.
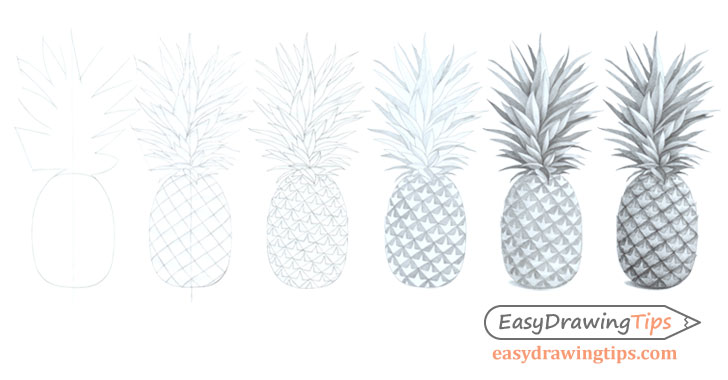
Though this is a fairly short tutorial drawing a realistic looking pineapple can be a little bit tricky. Be prepared to put in a little bit of time and effort if you want to get a nice looking drawing.
Step 1 – Pineapple Basic Shape Sketch
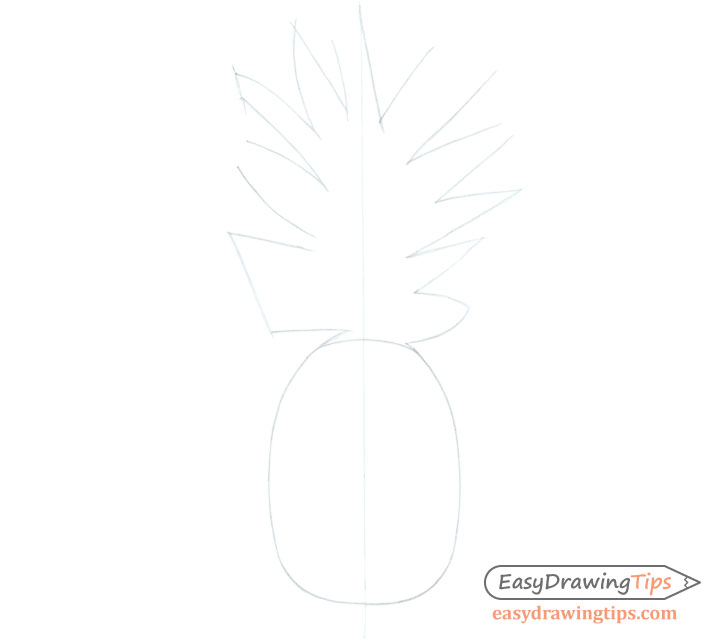
Start the pineapple drawing with a very simple construction line sketch to help define its shape. In this case the two major parts are the pineapple itself and the crown of leaves at the top.
Begin the construction line drawing by making a straight vertical line to help you insure that both halves of the pineapple are of relatively even width.
Draw the bottom portion similar to an oval with a flattened top and bottom. You can draw the leaves as a very rough sketch to just give yourself an idea of their overall shape and size.
Step 2 – Basic Line Drawing
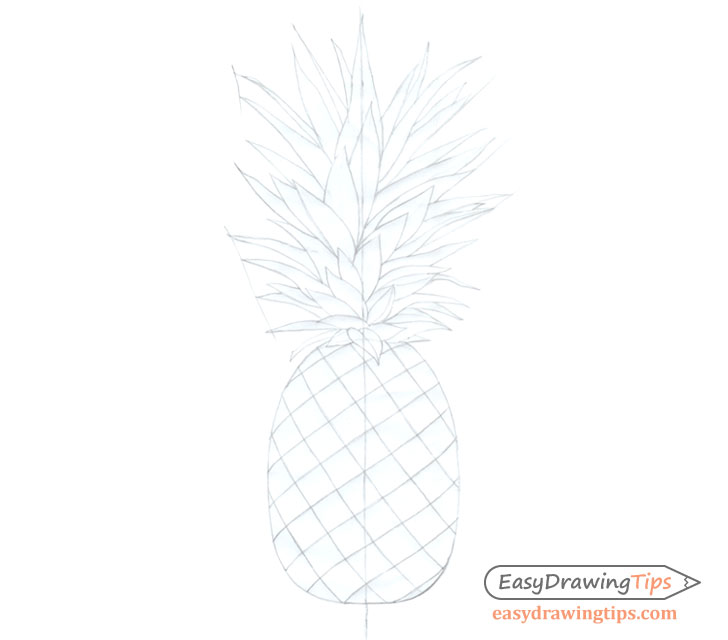
Based on the sketch in the previous step draw a sort of "net" over top of the pineapple to help you draw it's individual little sections. Next draw the outer shapes of each of the leaves.
Usually pineapples have shorter leaves towards the bottom with a gradual transition into longer leaves towards the top. The bottom leaves also tend to point more to the sides while top leaves grow more upwards. Take this into account and draw accordingly.
Step 3 – Line Drawing
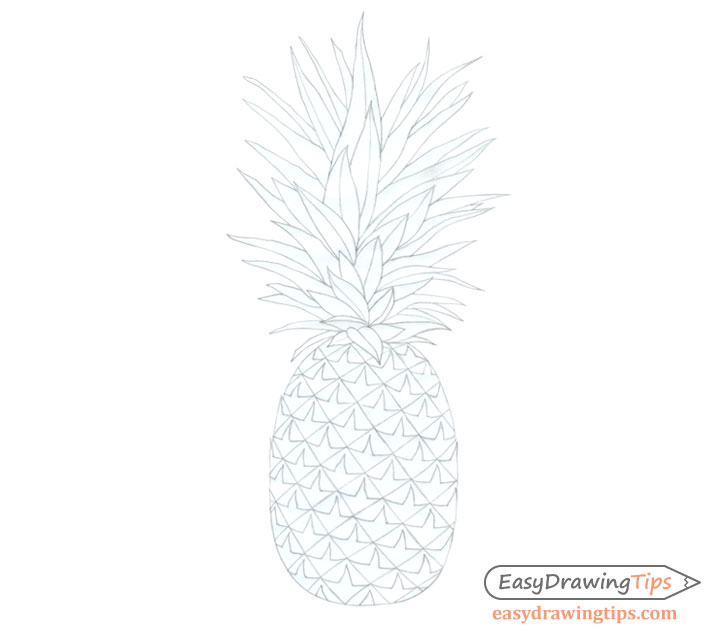
Clean up all of the constructions lines drawn in step one and add in the smaller details of the pineapple such as the little "teeth" shapes that grow from the bottom of each section.
A pineapple's leaves have are sort of folded into two halves so draw some lines (where visible) to show these folds.
Step 4 – Basic Shading
To begin shading the pineapple you can darken each one of it's small sections (leave the "teeth" white for now) and start adding some basic shading to the leaves.
In this case the light is coming from the top right side of the drawing so the darker "in shadow" areas will be on the left. As each of the leaves tends to point in a slightly different direction the darkness of the shadows will depend on how much the leaves are facing towards or away form the light. Generally the leaves on the bottom are more likely to be "darker" as they will have shadows cast on them by the top leaves.
For more on shading different shapes and an explanation of different stroke types see:
- Shading Techniques and Stroke Types Drawing Tutorial
- How to Shade Basic 3D Shapes Tutorial
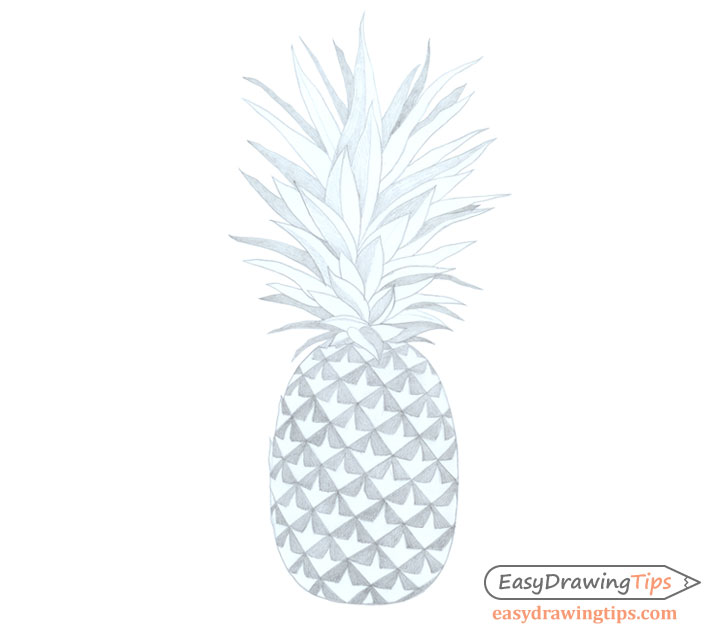
Step 5 – Gradient Shading
Darken the shadows on the leaves to pretty much finish the crown part of the pineapple and start applying some gradient shading to the pineapple itself. As already mentioned the light is coming from the right side of the pineapple so the darker area will be on the left.
Shade the right side with a set of crosshatch strokes making them lighter towards the right side of the drawing. As the surface of the pineapple is fairly rough there wont really be any highlights.
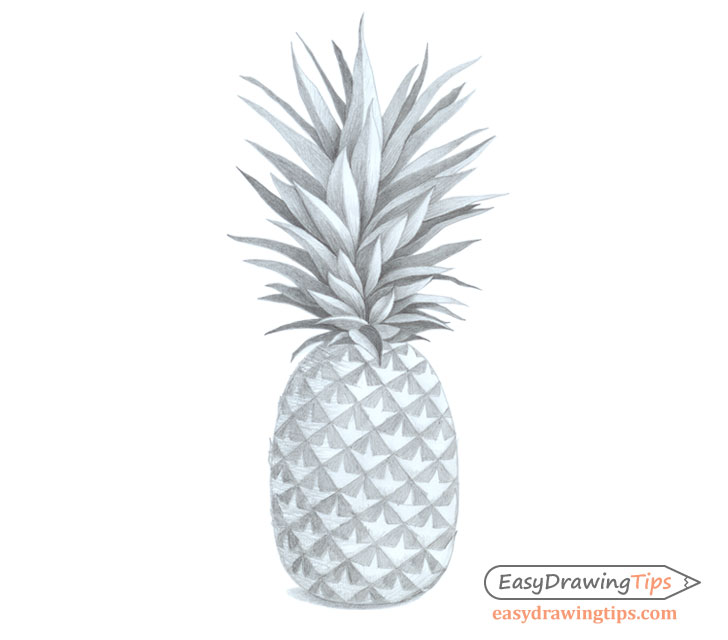
Step 6 – Finished Shaded Pineapple Drawing
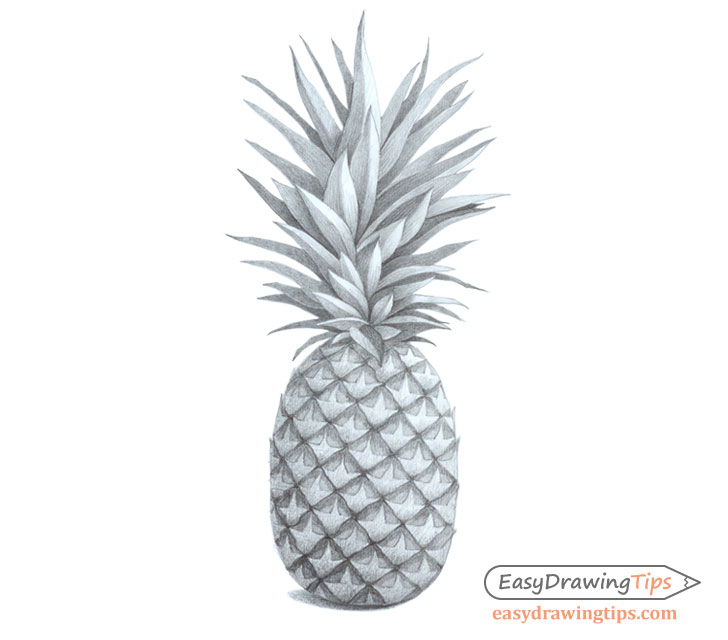
To finalize the pineapple drawing darken each individual section around the edges and create gradients that get lighter as they go towards the middle of each little "square". The tricky part here is that you still want to respect the overall lighting conditions (darker section on the right and lighter on the left with a smooth transition).
This shading process can be a little tedious but can also help you get a nice and realistic looking pineapple when done.
Conclusion
Drawing a pineapple can take a little bit of patience but if done right can also make for a very nice looking and impressive drawing. If you would like to try some more similar tutorials that are slightly easier see:
- How to Draw a Realistic Lemon Step by Step
- How to Draw a Realistic Pumpkin Step by Step Tutorial
- How to Draw a Realistic Watermelon Step by Step
Source: https://www.easydrawingtips.com/how-to-draw-a-realistic-pineapple-step-by-step/
0 Response to "Easy Drawings Tumblr Pineapple Easy Drawings Tumblr"
Post a Comment